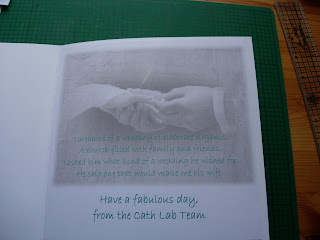
The two cards I'm showing, both have a Wedding theme. The first (8x8) is for a couple who have chosen a teal and ivory theme for their wedding, so I thought I would go with that. How difficult it is to find the matching colours, I found I was drifting back into turquoise a bit.
All of the images were found on the web from various sites on Google. I've matted and layered them to give a bit of dimension to the card. The card insert above, I put it through the Serif Digital Scrapbook Artist 2 software to make the image transparent. I added the text and printed the page, easy.
The next card (A5) is for one of my colleagues from Bangladesh. It's his wedding anniversary next week and I wanted to try something a bit colourful. Not as easy as I thought, but here it is.
For the insert this time, I had the white paisley paper open on Microsoft Word 2007. I left it in its original colour for the front, but I faded the insert. here's how: Select the image, select format, recolour and then pick the colour you want to fade it to. I chose a pale turquoise to match the front darker colour. To add the text over the images: Select the image, format, arrange, text wrapping and put the image behind the text. Then you can add what you want and get it in the right place before printing.
I'm off the Austria in two weeks for a month, so I've done all the cards I need to for the duration. I won't be taking any card crafting bits, I shall have to find other interesting things to do. I'll take my laptop, so I can add bits to the blog while I'm away. I'll go and hunt out the craft shops, if there are any!


No comments:
Post a Comment